As you start this job, be comforted that there is no piece here which cannot be repaired or replaced if you break it. Sprinkler heads are really not all that expensive. Couplers and funny pipe are cheap. The basic construction method for sprinkler systems has not changed in at least 20 years. It doesn’t matter if your sprinkler heads are pop-up sprays or rotors, the construction method is the same. Of course, you can’t tell until you’ve dug in and looked at what’s underground. If you get to the third picture below and discover something completely different than what I’m describing, you’ll need to stop and do some more research on your particular sprinkler system.
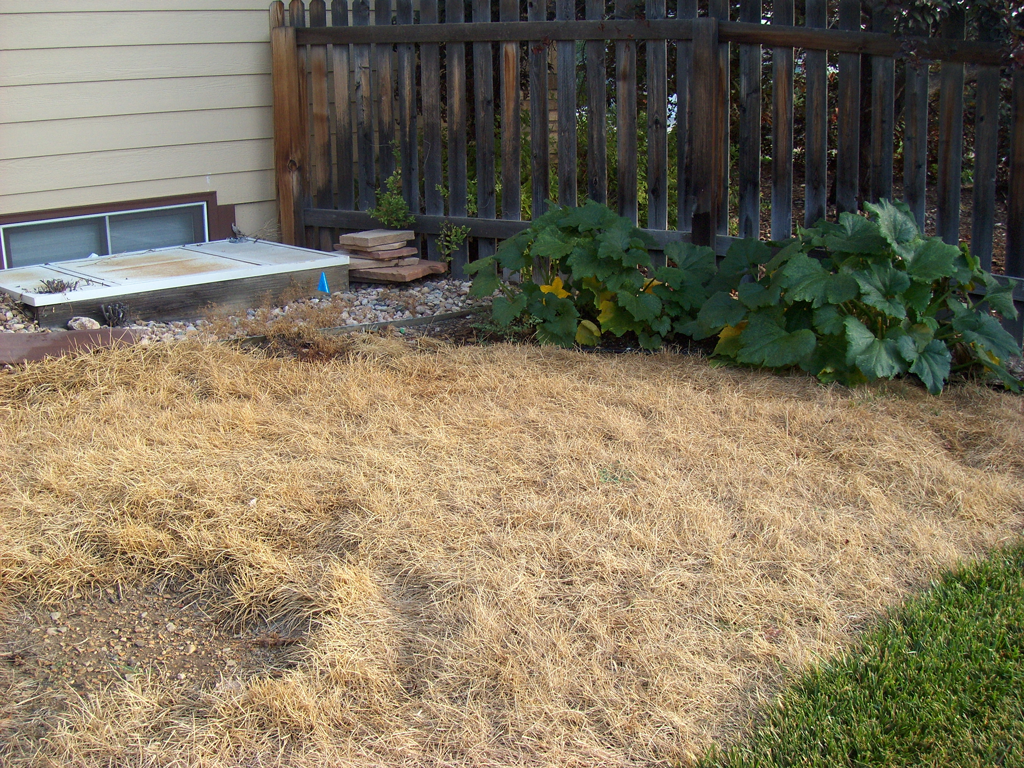
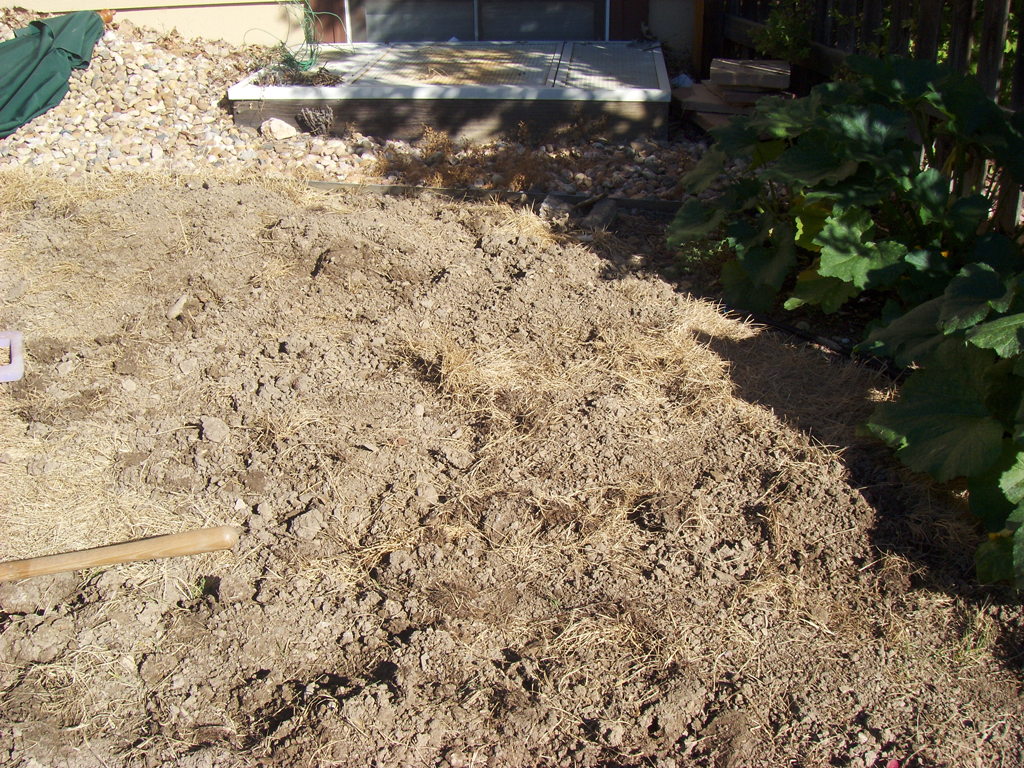
The area in this picture is going to be a vegetable garden. The grass has already been killed using Round-up and now the sprinkler heads need to be moved from the back of the area to the front of the area where the grass is still growing. (The vegetable garden will get its own drip system, but that’s a different problem.) I marked the sprinkler head with landscape flags. I also marked the adjacent heads. When working on a sprinkler systems you want each sprinkler head to water the head that’s next to it. That’s called head-to-head coverage. It’s really important that before you move the heads you figure out where you’re going with them and that you maintain the appropriate distance between the head that you’re moving and all those that are adjacent to it so that you still have head-to-head coverage.
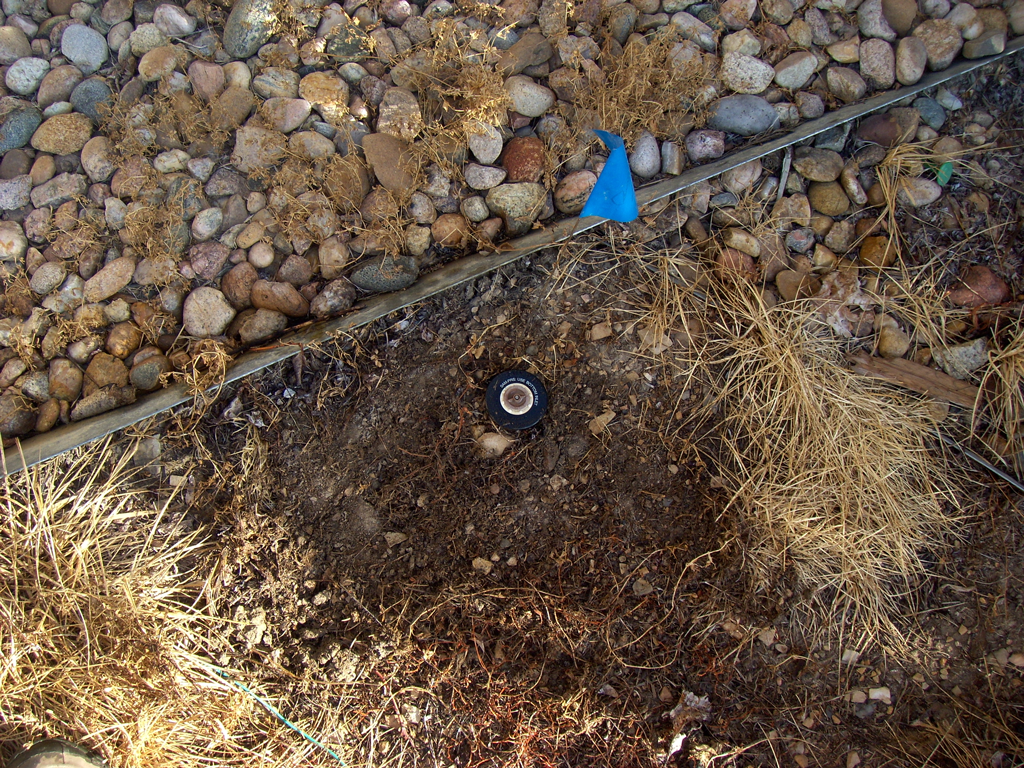
I’ve removed the dead grass from around the sprinkler head to dig it up. If the head you want to move is in the lawn and you want to keep the grass there, you will want to dig up large chunks of grass. Keep the soil on the roots—digging as deep as you reasonably can. As you go, set the pieces of grass aside in the same order you dug them up like you’re putting together a puzzle. If you can, put the pieces in a shady location and water them. Water repeatedly if it’s a real hot day or if the job is taking longer than you thought.
In this case, it’s not important to save the grass—it’s dead and I want it dead.
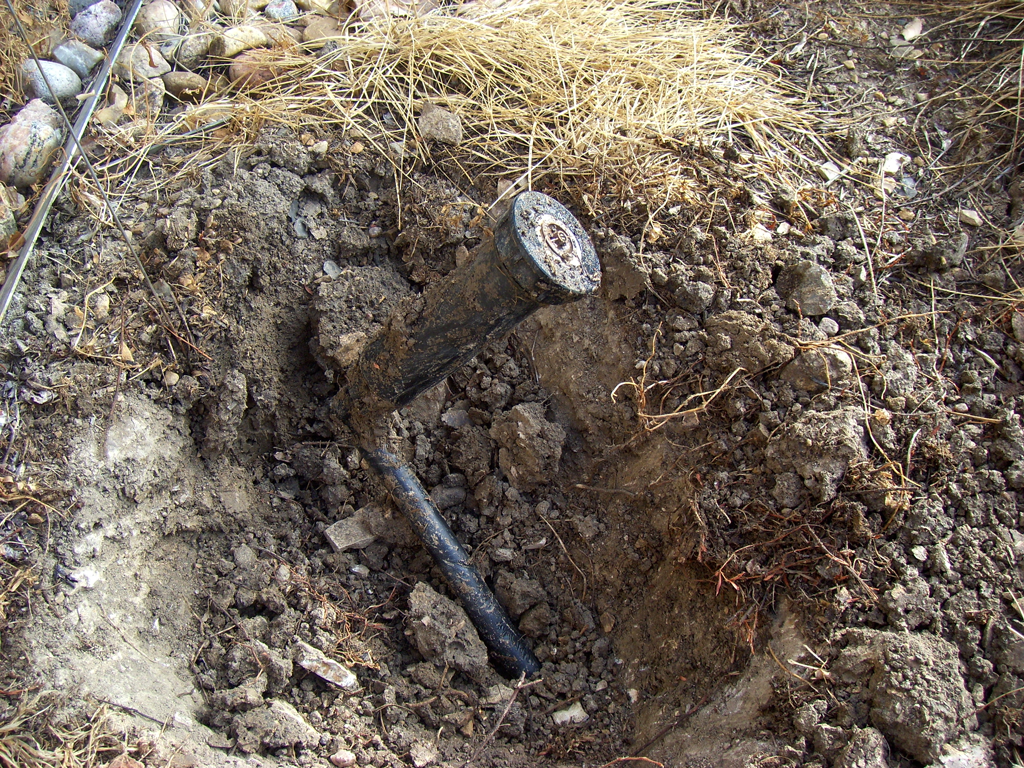
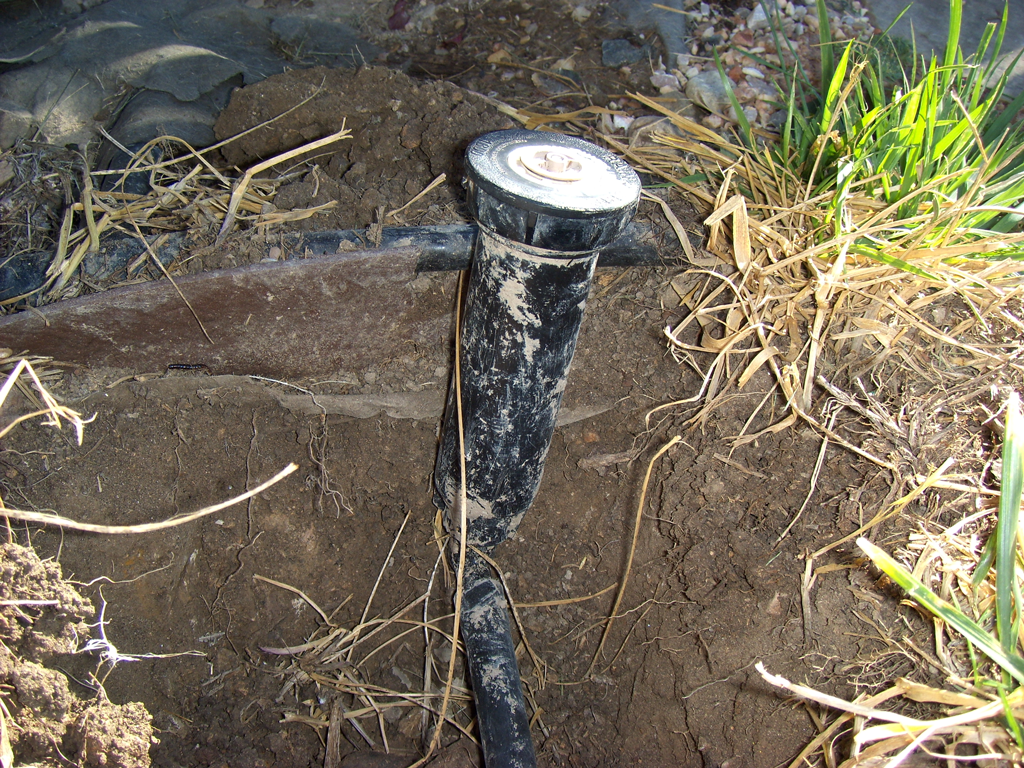
This is what you’ll find when you dig up the sprinkler head. The body of the sprinkler head is connected to a flexible, black tubing called funny pipe or swing pipe. This is what you will use to extend your sprinkler head.
As I was digging, I smacked the funny pipe with my shovel a few times and now it has some dings in it. That’s not a big deal. You are likely going to need additional funny pipe anyway and it’s easy to replace if it is actually punctured.
I’m going to continue digging back to find the lateral line since that is the direction I want to move the head. If you were going to move the head either further back or to one side, you would not need to dig any farther than this. Skip ahead to inserting the coupler to change the funny pipe.
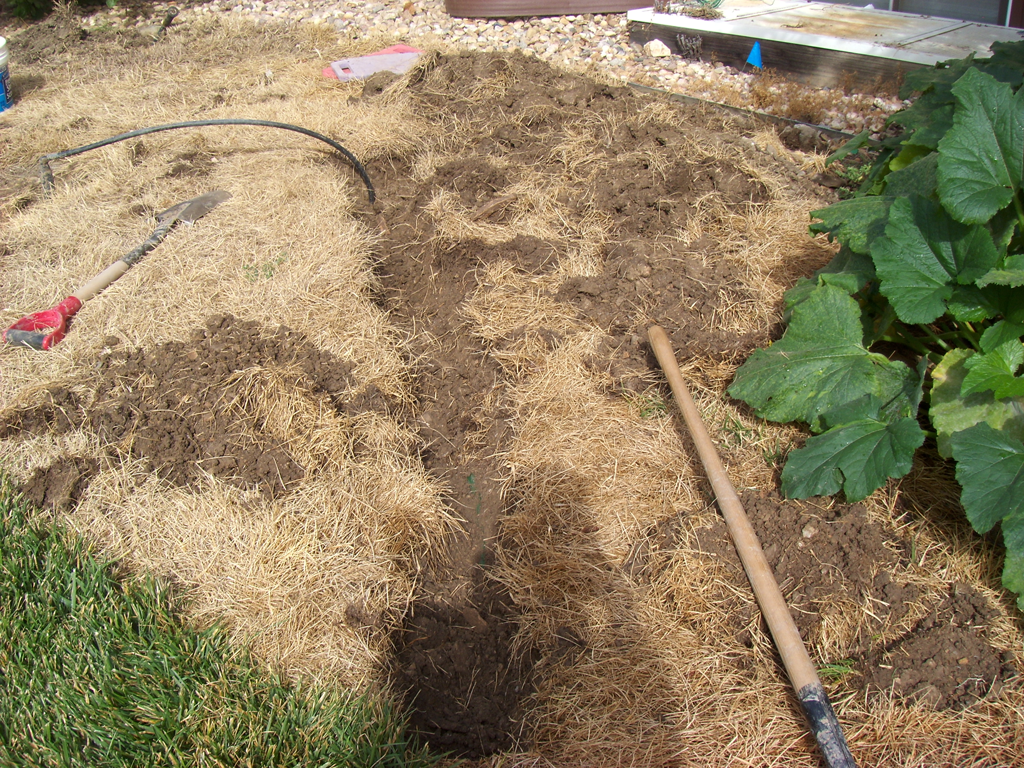
Continue to dig a trench, following the funny pipe, toward the lateral line.
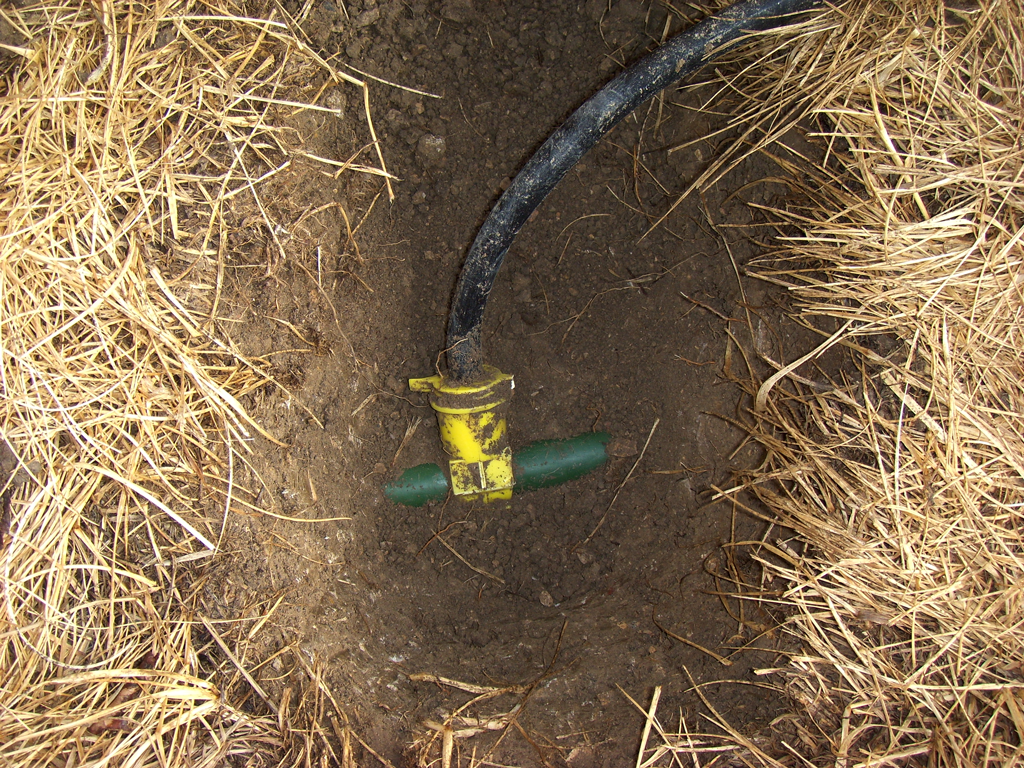
I found the lateral line! In this case it is a green 1” pipe. It may be white or it may be black. The yellow piece here is a saddle insert connector. There are several ways to connect the funny pipe to the lateral line which are all acceptable. It doesn’t really matter because I’m going to just leave that alone.Sometimes in the hole around this connection you will find some small pieces of tubing or other debris. Don’t let that bother you—it’s just trash that the sprinkler installers disposed of by throwing it down in the hole and burying it.
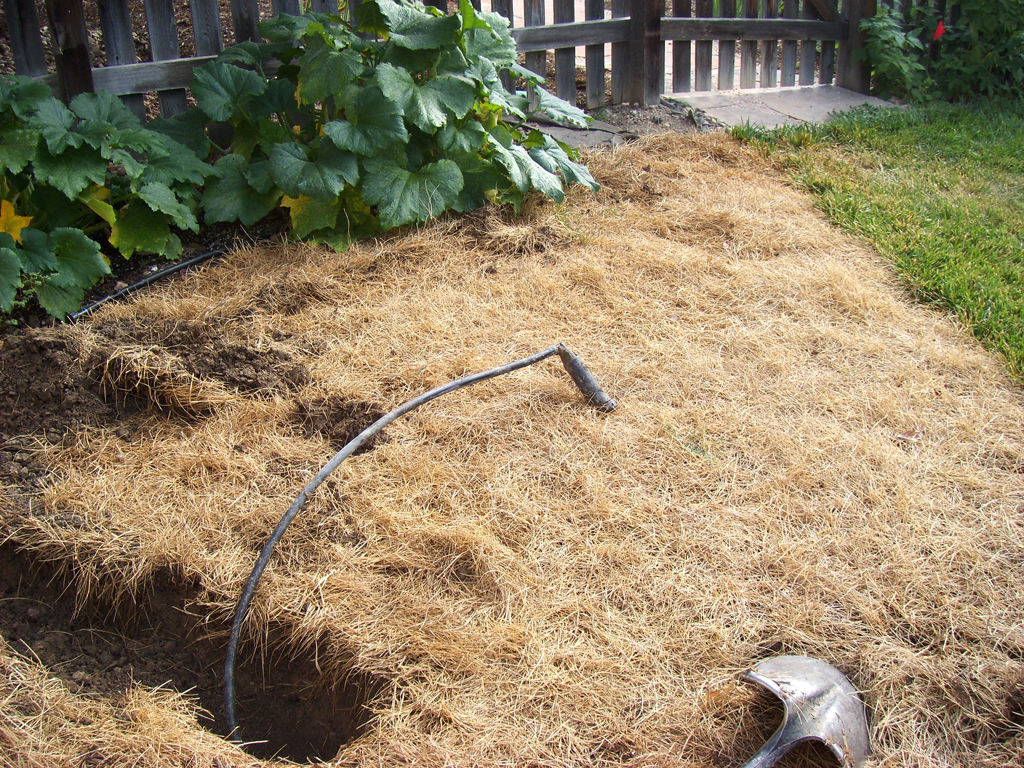
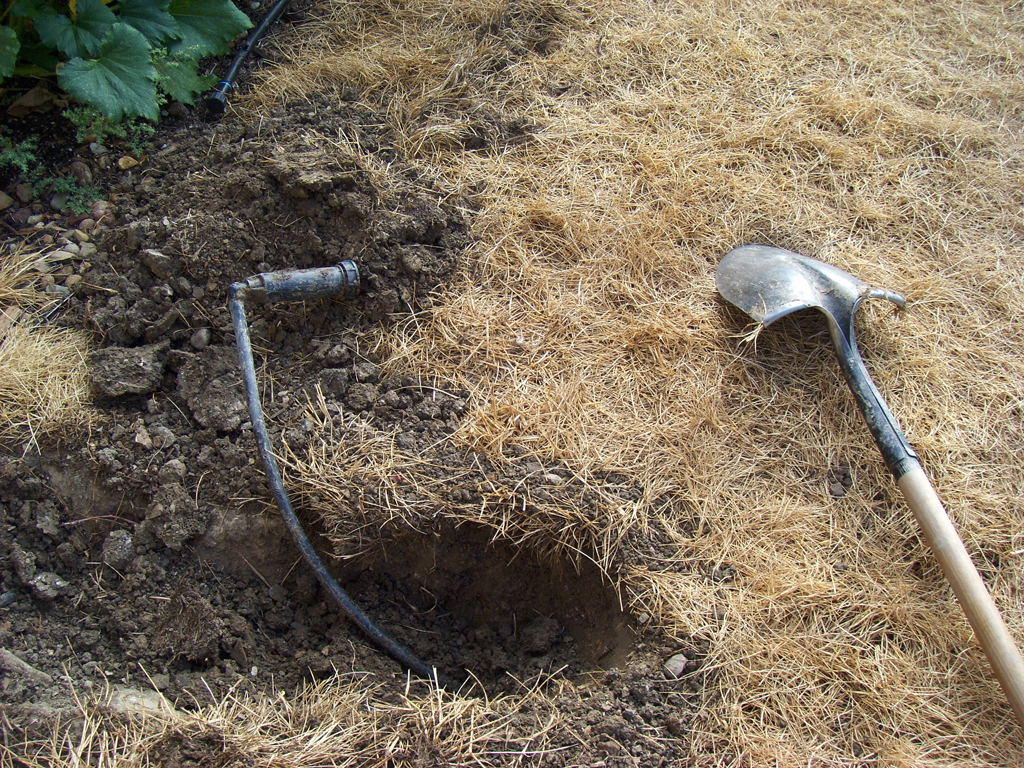
Next, lay the sprinkler head down in the direction you want to move it to and begin digging a trench to the new location. Be careful not to kink the hose with too tight of a turn.
Here’s my trench to the new location. The trench needs to be about 6-8” deep.
As a rule of thumb, the funny pipe should be about 15’ or less in length. If you are moving your sprinkler head more than 15’, you may also need to move the lateral line (which is just a little more complicated).
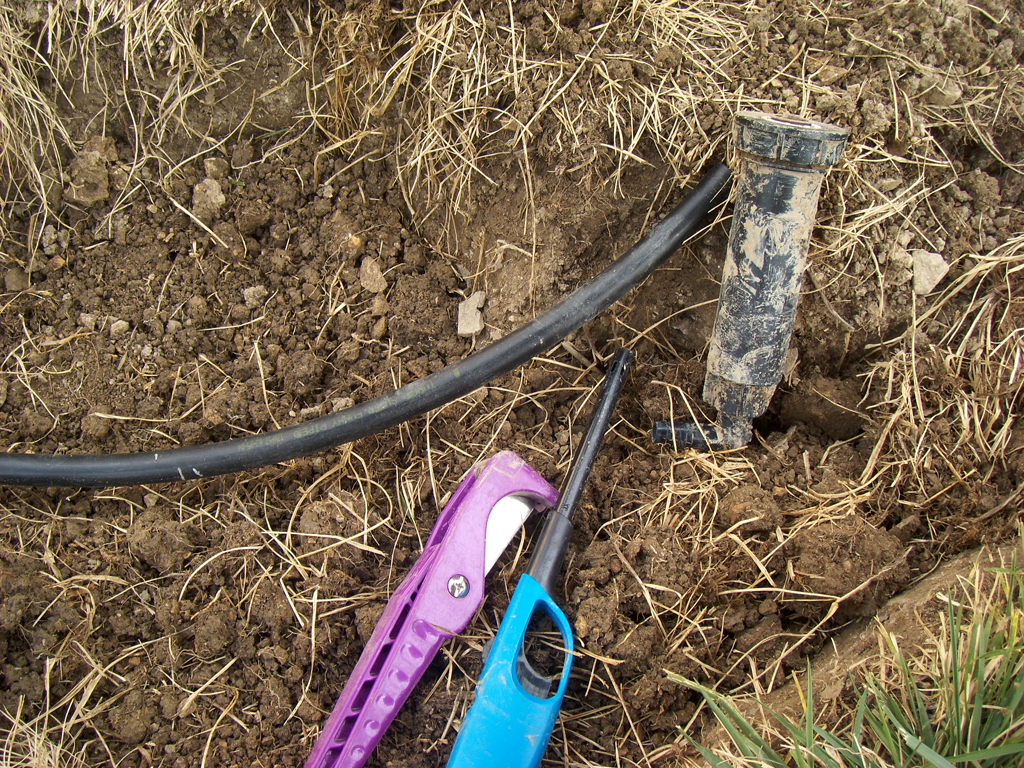
There are several tools you can use to cut the pipe. You can use a ratcheting pipe cutter, the one in this picture is Rainbird’s pipe cutter or, if you don’t have either of these tools, you can use a box knife.
There is a connector at the bottom of the sprinkler head which you don’t want to damage so cut the pipe about 2” away from the head. Try to make a nice, straight perpendicular cut as this will re-connect easier.
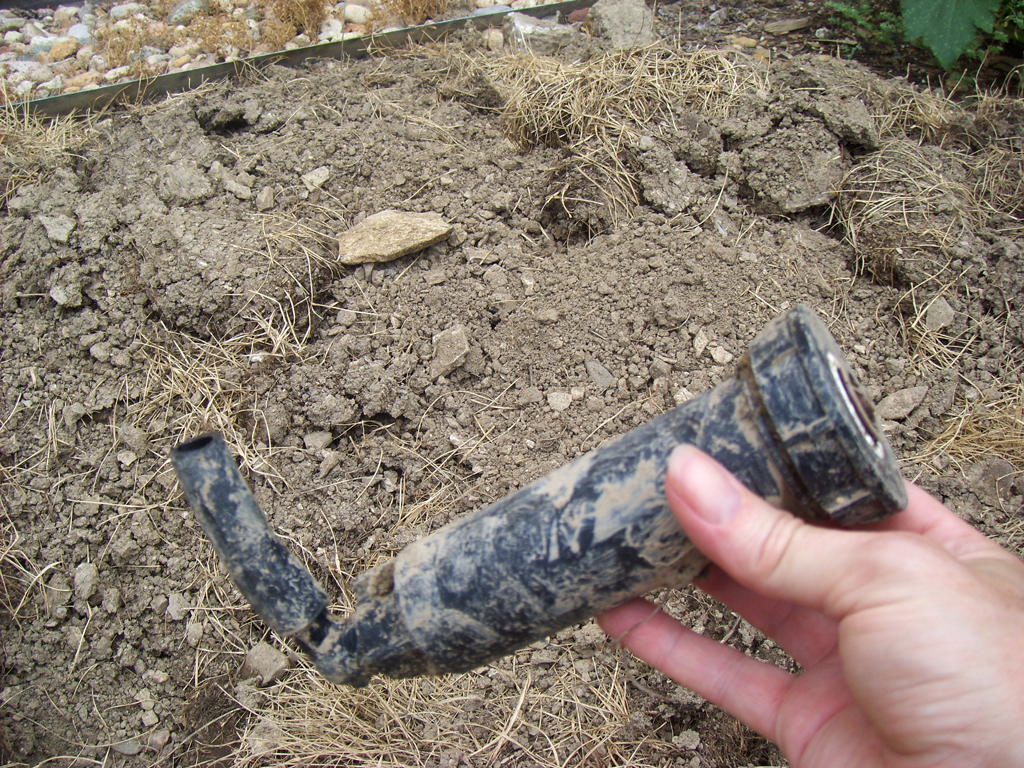
Now, while you can hold the sprinkler head in your hand, figure out how it works.
The body of the sprinkler head is like a canister. Inside there’s a spring which pulls the head back down when the water shuts off. Beneath the nozzle there is often a filter screen.
This one happens to be a Rainbird head. Most manufacturers make their sprinkler heads with interchangeable or adjustable nozzles. By changing the nozzle, you can change the distance of throw (how far the water sprays from the head). The spray pattern refers to whether the head is watering in a half-round pattern or a quarter- round pattern or anywhere in-between. Sometimes you have to change the nozzle to adjust the spray pattern and some are adjustable. Now is a great time to carry this dirty thing into the hardware store and get some free advise about how it works.
Remove the piece of funny pipe from the elbow coupler. I’m going to reuse the elbow at the bottom of the sprinkler head, so I don’t want to destroy it. Using a box knife, cut a slit through the funny pipe then pull it off using pliers to pull if necessary.
For re-attaching and extending the pipe you will need one funny pipe insert coupler (or funny pipe compression coupler) and a piece of funny pipe. Measure the distance of funny pipe you need. It is sold as “funny pipe” at Home Depot and Ace Hardware. Any brand is fine. Funny pipe is sold in 3 foot lengths and 100 foot lengths and sometimes in-between. If you need 5 or 6 feet, just use two 3 footers and join them together with another coupler.
Funny pipe and “1/2-inch drip tubing” are not the same. Be sure to get the right product.
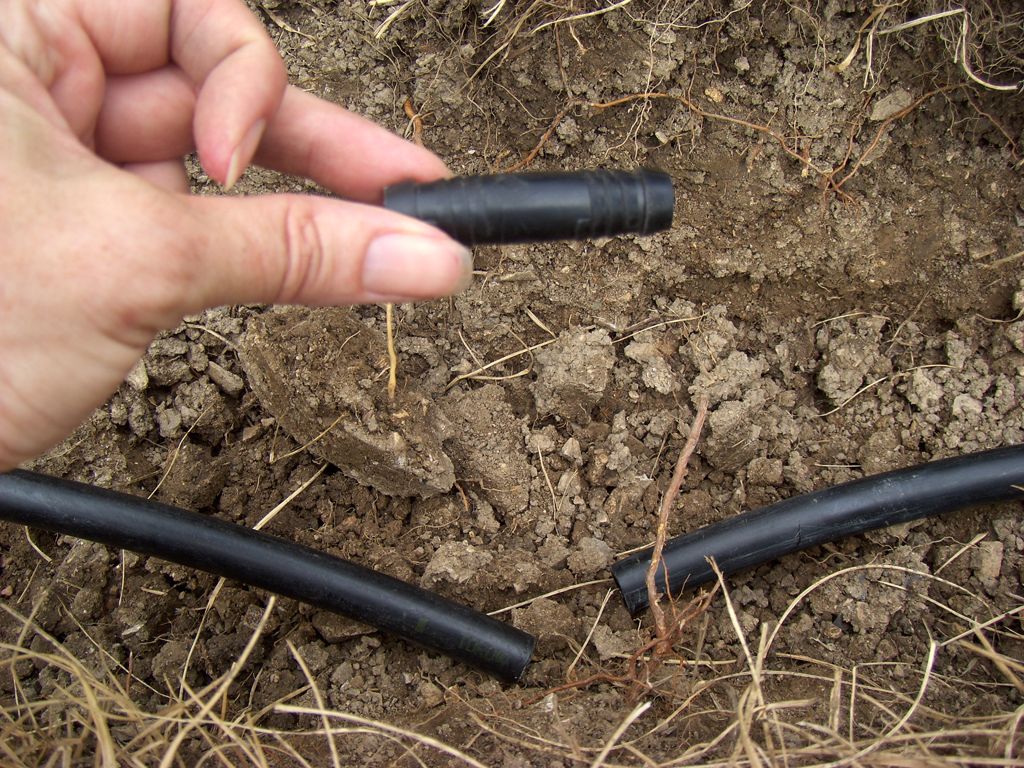
This is the insert coupler. It has ridges on both ends to keep it in place. These are generally used without pipe clamps; however, if you want to use pipe clamps on both sides you certainly can.
The coupler fits inside the tubing very tight and would be very hard to insert into the pipe unless…
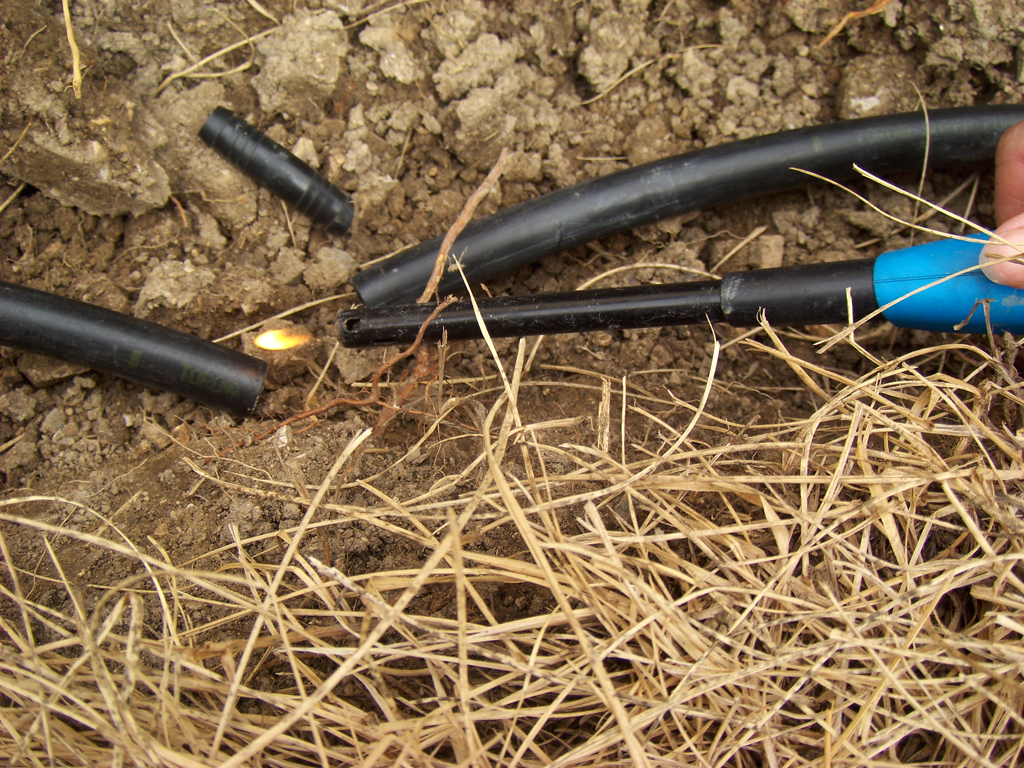
…you know this trick! Use a Bick lighter to warm up the end of the tubing. Hold the flame at the end of the tubing, moving it around to all sides for about 5-8 seconds. This warms up the tubing and makes it a little more malleable –then the coupler goes in pretty easily.If you hold the lighter on the tubing for too long (15-20 seconds) the tubing will start to melt and you will need to cut off that end and try again.
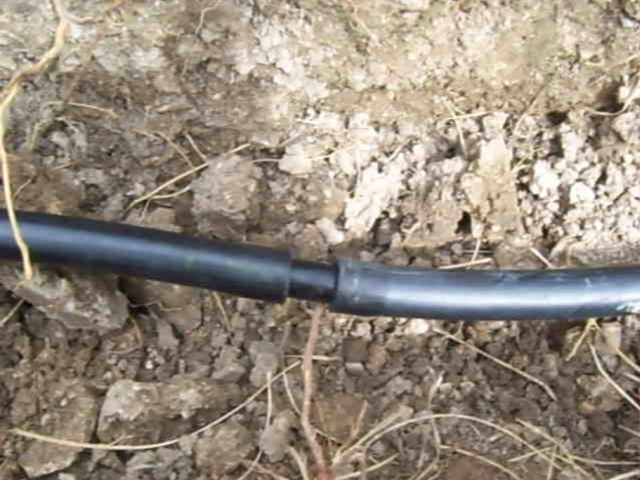
The coupler is installed in the pipe. You can still see the coupler but there will be plenty of water flow through it and you now have the extra pipe for your sprinkler head.
Now I’m going to cut the funny pipe to the exact length and reattach it to the coupler on the sprinkler head using the trick with the lighter again.
If your pipe is a little bit to long, just bend it around in the trench—it’s not that big of a deal. If you cut too short, well, you will need another coupler.
Place the sprinkler head in it’s new location. You want the top of the head just level with the ground—neither too high (it’ll get hit by the mower) nor too low (it won’t water well).
Adjust the spray pattern or change the nozzle as necessary.
Turn on the sprinkler zone to be sure it works and you don’t have any leaks. If you do have leaks, such as a hole in the funny pipe or the coupler isn’t in quite right, it’s not a tragedy. You can fix it, it just might require another trip to the hardware store.
Back-fill the hole around the sprinkler’s new location. Be sure the sprinkler head is straight up and down—not leaning to one side.Finally, cover your tracks. Fill in your trenches packing the soil down as you go. If you’re replacing the grass you dug up earlier, place the pieces back where they came from, fill in with soil around them, and water a lot for 2 weeks. The grass needs to stay wet until the roots have taken hold again.
GREAT JOB! You’ve moved a sprinkler head!
If you need help, run into an unexpected problem or need parts, please feel free to call me.
